Jun 16, 2014

back to basics - vegan sour cream


A few days ago I read a comment on another blog that vegan sour cream was hard to locate for the author. Whether you have easy access to vegan sour cream or not, this recipe, another one that didn't make it into my cookbook, Everyday Vegan Eats, is the perfect vegan sour cream recipe for any number of reasons: lack of availability or a need-to-know the ingredients in your condiment.

I did a lot of research into what makes dairy cream turn into dairy sour cream and I am here to share the delicious news.

Dairy sour cream is made by culturing cream. Dairy yogurt is made by culturing milk. The difference between cream and milk is the fat content. Cream is much higher in fat and therefore, dairy sour cream is higher in fat. Milk is lower in fat and therefore yogurt is lower in fat. 

It stands to reason that the difference between sour cream and yogurt is the fat content. This is the key to making homemade vegan sour cream taste delicious! Stirring vegan butter (homemade or store-bought) into homemade vegan yogurt adds much needed richness to the yogurt, which is easily made at home, and thus results in vegan sour cream. Add a little more tang to the yogurt and behold: homemade vegan sour cream. 

The tang is the next challenge. Yogurt has some of its own tang, but to make sour cream we need to add just a tad more. Most vegan sour cream recipes use lemon juice to achieve that tang, but adding just lemon juice is not enough - another dimension is needed since lemon juice alone leaves the typical homemade vegan sour cream flat.

This is where lime juice is useful. Lime juice is tangy, but since it is slightly different from lemon juice, it layers the tangy goodness, and thus offers another needed dimension of flavor without adding any unusual acid, such as vinegar.

You must use homemade vegan yogurt for this (link to yogurt making steps and recipe). All store-bought yogurt tested in this recipe did not taste good. In fact, your own homemade yogurt cultured with your own homemade yogurt is the very best! The only exception might be, which I haven't tried, yet, is Whole Soy, which has been off the market for a while, but is now back on the shelves.

Make sure that you drain your yogurt for four hours before making the sour cream. Use cheesecloth layered 8 times or a nut milk bag. Set the yogurt in the cheesecloth, set the cheesecloth in a strainer and set the strainer over a bowl. 

Now you can make your own creamy, dreamy, tangy vegan sour cream at home, in a few easy steps.

STEP 1: ASSEMBLE INGREDIENTS


INGREDIENTS: VEGAN YOGURT, VEGAN BUTTER, SILKEN TOFU, LEMON AND LIME JUICE, SALT


STEP 2: BLEND ALL THE INGREDIENTS AND CHILL TO THICKEN


Speaking of Everyday Vegan Eats


Vegan Crunk of Cookin' Crunk, reviewed Everyday Vegan Eats and I deeply appreciate it. She made this Creamy Macaroni Salad from EVE. Thank you, Bianca!


The Vegan Cookbook Aficionado by Maggie did a bang up job of reviewing the book, complete with gorgeous photos, such as this one of the Deli Reuben:

Photo by Maggie Muggins of Vegan Cookbook Aficionado


And in case you have't seen the recipe for Baked Macaroni and Cheese, Chic Vegan has posted it:


From around the web, a few other bloggers have taken precious time and energy to review Everyday Vegan Eats, such as another one of my fabulous testers, Claire of Great Vegan Expectations, who has this great photo of Flaky Buttermilk Herb Biscuits.  Thank you, Claire!


And VegBlogger, who reviewed the book and made my kids' favorite dish: Tater Tot Casserole. Thank you for your review and kind words!


Jun 14, 2014

spinach pesto with fava beans and potatoes bowl

I've recently been on this kick of making food in a bowl. Robin Robertson has a whole chapter on bowl dishes in her new cookbook More Quick-Fix Vegan, and I know that a lot of people enjoy eating a great meal with all the components in one big bowl.

I designed this bowl of food around my produce box, hence it is seasonal and, as an added bonus, I got to use some unique ingredients that somehow always seems to find its way into my box.

Last week I received fennel, more new potatoes and fresh fava beans. Fava beans are incredibly delicious, if you ever have the opportunity to find them fresh. However, they are truly a labor of love, as the beans need to be shelled, quickly blanched and then peeled of their tough outer skin. Once the beans are blanched, the tough outer skin can be easy pierced and the delectable beans popped out of their skin.

Fava beans are buttery and creamy and I fell completely in love with them with the very first bite.

The potatoes are roasted with the fennel, which adds a wonderful light anise flavor and the ingredients are then tossed with an easy-to-make nontraditional pesto.

Squeeze some fresh lemon juice on top of each serving to cut through the richness of the potatoes and fava beans and enjoy! I served ours with some toasted French bread.


Spinach Pesto with Fava Beans and Potatoes Bowl   
Serves 4

6 garlic cloves, minced and divided
5 tablespoons vegetable broth, divided
3 tablespoons olive oil, divided
Sea salt and fresh ground black pepper
2 pounds small new potatoes, halved
2 small fennel bulbs, cored and thinly sliced
2 pounds fresh fava beans, shelled (about 2 cups)
3 cups fresh baby spinach
1 ounce fresh basil leaves
1 teaspoon neutral oil
Lemon wedges, garnish


1. Preheat the oven to 450-degrees F. Combine 4 minced garlic cloves, 3 tablespoons vegetable broth, 2 tablespoons olive oil  and salt and black pepper, to taste, in a small personal blender. Blend until smooth.
2. Mix the potatoes, fennel slices and garlic-mixture in a medium bowl. Transfer the potatoes to a baking sheet. Bake until tender and golden, about 30 minutes.
3. Bring a medium pot of salted water to boil over medium heat. Add the shelled fava beans and cook for 3 minutes. Immediately transfer the cooked beans to a large bowl of ice water to cool. Using a slotted spoon, transfer the beans to a separate bowl. Add the spinach to the boiling water and cook for 1 minute.Transfer to the bowl of ice water to cool. Drain the spinach and squeeze out excess moisture. Transfer the spinach to a food processor and set aside.
4. Peel the blanched fava beans. Each bean is encased in a tough outer-skin that needs to be removed.
5. Add the basil, 2 minced garlic cloves, 1 tablespoon olive oil, 2 tablespoons vegetable broth and salt and black pepper to the food processor with the spinach. Process until smooth as possible and set the pesto aside.
6. Heat 1 teaspoon of oil in a medium skillet over medium heat. Add the peeled fava beans and saute until golden, about 3 minutes. Add the roasted potatoes and pesto. Mix well to combine and cook to reheat the potatoes and pesto, about 3 minutes. Taste and adjust seasoning. Serve the potatoes and beans with lemon wedges.


© 2014 Copyright Zsu Dever. All rights reserved.

Jun 2, 2014

"vegan finger foods" winner


The winner of "Vegan Finger Foods" cookbook by Tamasin Noyes and Celine Steen is comment number 37...Jenny Bunny.

Contact me with your address and we'll get the book out to you as soon as possible!

zsu (at) zsusveganpantry (dot) com

May 21, 2014

back to basics - homemade soy yogurt

Everyday Vegan Eats has been out for about a week now and I hope you have seen the recipes from the cookbook floating around the web. Don't forget to enter the giveaways for the book on Tami Noyes' site and Robin Robertson's site before they end today.


Since the book is hopefully in a few hands by now, I'd like to post a few recipes that didn't get into the book. These recipes are important in the sense that having the ability to make them at home is not just beneficial economically, but also gives us the chance to make these basic recipes ourselves, controlling the quality as well as the ingredients.

I speak of dairy substitutes: soy yogurt, vegan sour cream and vegan cream cheese.

While developing recipes for EVE, I realized how important it is to be able to make these basics ourselves, in case they are hard to attain or, just simply, are more desirable as homemade products.

I did a lot of research regarding the dairy equivalents of yogurt, sour cream and cream cheese and had a few epiphanies. From these revelations I realized that I could make a really excellent vegan sour cream and vegan cream cheese using vegan yogurt. The only catch is that homemade yogurt is the best.

There are a few commercial vegan yogurts on the market, but the only one I would recommend is the Whole Soy brand, in terms of texture and flavor. Since Whole Soy has just returned to the market, I haven't had the chance to test the sour cream and cream cheese recipes using Whole Soy yogurt, but I did have the chance to try my recipes using the other brands on the market, unfortunately, with dismal results.

Another issue regarding store-bought yogurt, beside flavor and texture, is the difficulty in finding a brand of plain vegan yogurt that is unsweetened. That is the best kind to use in savory dishes and since good brands are few and far between, homemade is your best bet.

Conclusively, the best vegan yogurt is one you make yourself. The good news is that it is easy! All you need is soy milk with sugar content of 6 grams (this is the optimal sugar content to help feed the live cultures) and a small container of plain yogurt from the store. Any brand will do as long as it contains live cultures: almond, coconut or soy, it matters not.

After you make your first batch of yogurt you will make any subsequent homemade yogurt using your own homemade yogurt to start a new batch. In addition, yogurt you make using your own yogurt will get better and better with every batch!

Let's get started!


You will need:

  • 1 quart soy milk with 6 grams of sugar at least
  • large pot
  • thermometer - I use an instant read thermometer
  • fine-mesh strainer
  • store-bought plain yogurt with live cultures (you will use 1/4 cup)
  • bowl with plastic wrap
  • warm place to incubate yogurt, such as dehydrator
  • cheesecloth or nut milk bag


STEP 1 - HEAT MILK


Transfer your milk to a large pot. Bring the milk to a boil over medium heat. Boil the milk for two minutes and remove from the heat.


STEP 2 - COOL MILK


Cool the milk to about 110-degrees F, but no more than 112-degrees or less than 100-degrees. Cooling the milk will take about 15 minutes.


STEP 3 - STRAIN MILK


Strain the cooled milk through a fine-mesh strainer into a bowl. This step will produce a smooth final yogurt, removing any soy milk skin that developed as the milk cooled.


STEP 4 - CULTURE MILK


Whisk in the 1/4-cup yogurt and cover the bowl with a plastic wrap.


STEP 5 - INCUBATE MILK


 Place the bowl in a warm spot, one that will keep the inoculated milk at a steady 110-degrees F for 9 hours. 6 hours. [I found 9 hours made the yogurt too tangy - start checking it at 6 hours and see if you'd like more tang.] A dehydrator or the Instant Pot 7-in-1 (which you can use to prepare it from start to finish0 works beautifully. Check out some other warm spots at the end of the post.


After 6 hours your yogurt will look like this. If you tip the bowl you can see the whey and the curds separate somewhat. You will be able to make thicker yogurt when you begin using your own homemade yogurt for the culture.


STEP 6 - CHILL YOGURT


Transfer the yogurt to a container and cool the yogurt in the refrigerator. The chilling will thicken the yogurt a bit more. Chill for at least a few hours.


STEP 7 - STRAIN YOGURT


When chilled, remove 1/4 cup of the yogurt and set aside to culture your next yogurt. Drain the yogurt for 20 minutes through 8 layers of cheesecloth or a nut milk bag by transferring all of the yogurt to the cheesecloth or nut milk bag. Place the nut bag over a strainer and the strainer over a bowl. 


There you have it. Homemade soy yogurt. Whisk the yogurt using a whisk before storing in the fridge to use as needed. 


You will need homemade yogurt to make vegan sour cream and vegan cream cheese. Those posts will be coming in the following weeks.

As a gentle reminder, the giveaway for Tamasin Noyes' and Celine Steen's new cookbook, Vegan Finger Foods, will be ending May 29, so make sure you have entered HERE.


Warm Places to Incubate Yogurt

Yogurt incubates best at 110-degrees. If all else fails, get a yogurt maker.

Here are a few ideas for an ideal environment to incubate yogurt:

 ~ A yogurt maker! ~ Dehydrator set to 110-degrees. ~ Oven that maintains a 110-degrees with the aid of a pilot light and oven light. ~ Oven that maintains a 110-degrees with the aid of 2 tea candles. Light 2 new tea candles after 4 hours. ~ Place an electric heating pad set to medium between two bath towels on the counter; place the bowl on the towel and wrap another bath towel over the bowl to make a warm nest. ~ Transfer the yogurt to 2 (1-quart) jars; place jars in 3-inches of hot water in an ice chest; reheat the water as needed.

If any of these warm places are less than 110-degrees, the incubation will take longer, about 1 to 2 hours more. Do not let the yogurt incubate for longer than 10 hours, though; it begins to develop a yeasty flavor.


May 18, 2014

hungarian twice-baked potatoes + blog tour summary


Growing up, my mother used to make mashed potatoes loaded with caramelized onions and paprika. This is a complete comfort food for me and when my kids asked for twice-baked potatoes, I was instantly reminded of those potatoes.

When I think of traditional twice-baked potatoes, I have flashbacks of lots of cheese, butter and bacon. Loaded with fat. The beautiful thing about these potatoes is that they are flavorful without all the added fat. I also added spinach to my filling to increase the nutritional element. Very happy I did! The kids loved it and this is a wonderful version of a baked potato. 

Use an ice cream scoop to remove the inside of the baked potatoes, but take care to leave enough potato in the skins to maintain the integrity of the walls of the potatoes, otherwise you'll wind up with a floppy potato skin, one difficult to stuff. 


As I am sure some of you know, my cookbook, Everyday Vegan Eats, hit bookstores and Amazon earlier this week. To launch the book, we are celebrating with a blog tour, one going from Canned-Time to Robin Robertson's Global Vegan Kitchen. Most of the stops along the tour are offering a chance to win my cookbook, so I hope you have maximized your chances of winning by entering every single one!

Along the tour, you've had a chance to sample recipes from the cookbook and I couldn't be happier! 

A word of note, though, many of the giveaways are ending in the next few days, so don't delay. Click the links and enter to win!


TOUR STOPS:


GIVEAWAY ends May 20th.


Photo by Angela McKee


VeggieGirl.com, featuring Scampi Pasta:

GIVEAWAY ends May 19th.


GIVEAWAY ends May 20th.


Photo by Cadry


GIVEAWAY ends May 22nd.


Photo by Tamasin Noyes


GIVEAWAY ends May 22nd. This is a double giveaway in that Robin is giving away my book AND her new More Quick-Fix Vegan cookbook. Win them both!


Oakland Veg featured my Pad Thai recipe:


Mrs. Pine Nuts also wrote up a review on her blog. She was one of my amazing testers and she runs down the dishes she made. Her post is HERE.


If you do not win, don't fret! Either buy your own copy or wait for more giveaways coming next week. GiGi at Veganville and Maggie Muggins at The Vegan Cookbook Aficionado will be our next stop along the blog tour, with giveaways at both stops.

As a reminder, if you haven't entered the giveaway for Tamasin Noyes' and Celine Steen's Vegan Finger Foods cookbook, make sure to enter HERE.


I am linking to these recipe parties: The blogs hosting Healthy Vegan Fridays are Suzanne at Hello Veggie, Anna at Herbivore Triathlete, and Kimmy at Rock My Vegan SocksI’ve also decided to submit this dish to What I Ate Wednesday hosted by Peas and Crayons. 


I am linking to these recipe parties: Healthy Vegan FridaysWhat I Ate Wednesday and Virtual Vegan Linky Potluck. 


Pin it!


May 5, 2014

"vegan finger foods" giveaway


SPINACH SWIRLS


It's that time again, when another wonderful cookbook I tested for is being released across bookstores nation-wide and I get to give away a copy to a lucky winner. I seem to be rotating back and forth between Robin Robertson and the duo of Tamasin Noyes and Celine Steen. 

The duo's latest creation is Vegan Finger Foods. Get the party started! The ladies have conjured up "more than 100 crowd-pleasing recipes for bite-size eats everyone will love." Including my family!

During testing, I feasted on Spinach Swirls (above), with a Quickie Marinara dip. Below is Banh Mi Lettuce Wraps, which is truly scrumptious.

BANH MI LETTUCE WRAPS

This book, as all of their cookbooks from Fair Winds, is just as beautiful as their first one, Vegan Sandwiches Save the Day! They keep the goodies coming with the Hot Pepper Toastwiches, pictured below.


HOT PEPPER TOASTWICHES

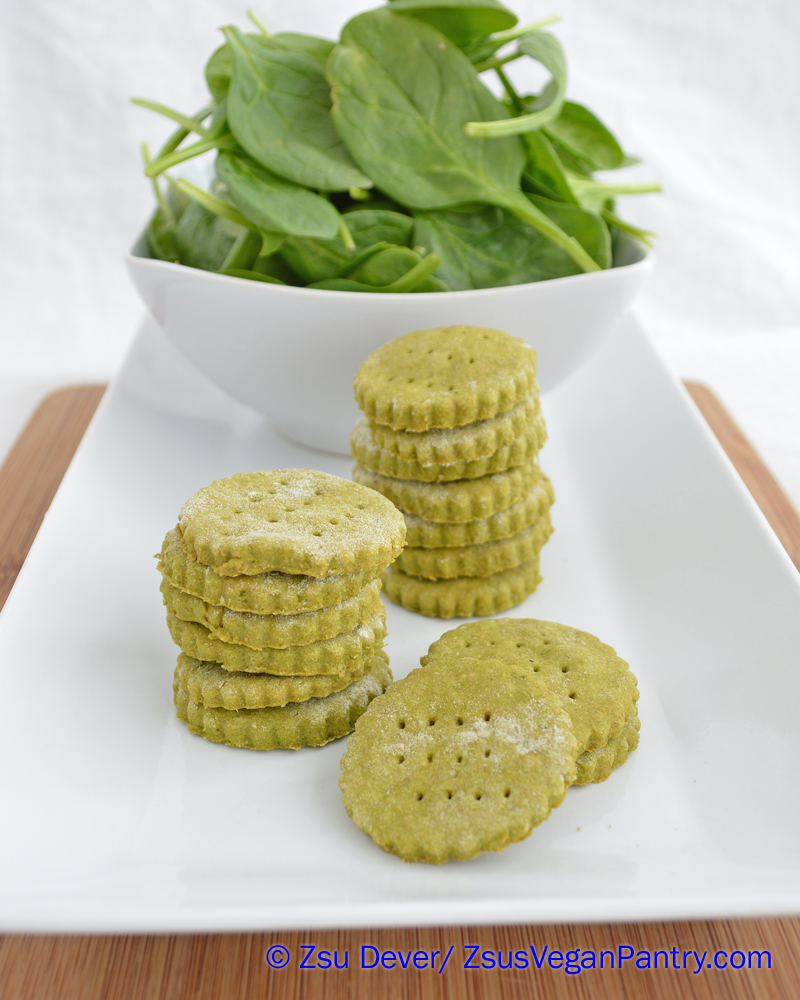
GREEN SNACKERS

Another favorite was the Green Snackers, above, perfect for dipping or just chowing down, and Polenta Fries, below. This is the way to throw a party!


BAKED POLENTA FRIES WITH AVOCADO DIP

And this was one of my faves during testing, the Portobello Horseradish Bruschetta. The mushroom was tender, the sauce just piquant enough and the pea shoots added just the right touch of crunch and earthiness. So delicious!

PORTOBELLO HORSERADISH BRUSCHETTA

The ladies and Fair Winds Press have sanctioned the publication of the recipe for the first photo, Spinach Swirls with Quickie Marinara:

Spinach Swirls
Yield: 20 swirls

These easy little spinach bites are an impressive part of an appetizer spread. Try to resist eating the filling with a spoon, but we won’t blame you if you do. Serve these with our Quickie Marinara (page 16).

For the dough:
1⁄2 cup (120 ml) warm water
1 teaspoon Sucanat
1 teaspoon active dry yeast
1 cup (120 g) white or regular whole wheat flour
1⁄2 cup (63 g) all-purpose flour
2 tablespoons (30 ml) olive oil
1⁄2 teaspoon Italian herb blend
1⁄2 teaspoon fine sea salt
Nonstick cooking spray

For the filling:
3 cups (90 g) finely chopped spinach
2 tablespoons (15 g) nutritional yeast
1 tablespoon (15 ml) olive oil
1⁄4 teaspoon ground black pepper

To make the dough: Stir together the water, Sucanat, and yeast in the mixing bowl of a stand mixer fitted with a dough hook. Stir and let sit for 5 minutes, until the yeast bubbles. Add the flours, oil, Italian herb blend, and salt. Mix on low until the dough forms a smooth ball, about 6 minutes. (Alternatively, knead by hand on a lightly floured surface for 10 minutes.) Add an extra 1 tablespoon (8 g) flour or (15 ml) water if needed to make a cohesive dough. Coat a large bowl with cooking spray.

Round the dough into a ball and place it in the bowl, turning so the oiled side is up. Cover with plastic wrap and let rise until doubled, about 1 1⁄2 hours. Lightly dust a work surface with flour. Divide the dough in half and roll each half into an 8 ≈ 10-inch (20 ≈ 25 cm) rectangle.

Preheat the oven to 375°F (190°C, or gas mark 5).

To make the filling: Stir together the spinach, nutritional yeast, oil, and pepper in a medium-size bowl. Spread half the filling evenly on each rectangle. Roll from the 10-inch (25 cm) side, pinching the dough together as you go, including the ends and the last edge of the dough, so the swirls don’t unwind in the oven. Cut each roll into 1-inch (2.5 cm) slices, and place on a baking sheet with the filling side on top, and against the baking sheet.

Bake the rolls for 18 to 22 minutes, until lightly browned and the centers are cooked. Serve hot, warm, or at room temperature.

Quickie Marinara
Yield: 13⁄4 cups (415 ml)

Extra easy, famously fast, and very versatile, this is a go-to in our homes to use as a pizza sauce,
for dipping sandwiches or calzones, and served alongside our Twisted Bread Sticks (page 108) and Spinach Swirls (page 111). Nobody will believe you can make a sauce this flavorful in only 15 minutes. Because canned tomato sauces vary in consistency, add a tablespoon or two (17 to 33 g) of tomato paste to thicken the sauce if needed.

1 teaspoon olive oil
1⁄2 cup (80 g) minced onion
3 cloves garlic, minced
1 teaspoon Italian herb blend
1⁄4 teaspoon ground black pepper
Pinch red pepper flakes
1 can (15 ounces, or 425 g) tomato sauce
Fine sea salt, to taste

Heat the oil and onion in a medium-size saucepan over medium heat. Cook until fragrant, stirring occasionally, about 3 minutes. Add the garlic, herb blend, pepper, and red pepper flakes. Cook, stirring for 2 to 3 minutes, until the garlic is fragrant, but do not brown it.

Add the sauce and reduce the heat to a simmer. Cook the sauce for 10 minutes, stirring occasionally. Taste and adjust the seasonings. The sauce may be made ahead and refrigerated in an airtight container for up to 2 days. Gently reheat over low heat if refrigerated.


After you've come back from the kitchen with a plate full of Spinach Swirls, enter the contest to win your own copy of Vegan Finger Foods. By now you know that I hold giveaways quite frequently, so hopefully you won't mind following me on Twitter or liking me on Facebook. Once that is taken care, just leave a comment and a winner will be chosen on May 29, my son's birthday. Contest open to US and Canada residents. {Winner will be announced on the second of June}

Since my cookbook, Everyday Vegan Eats, will be releasing next week, there will be more giveaways before the month is up! 

AND, in case you missed it, Tami is hosting a raffle (Quilts for the Cause) which benefits two amazing charities. Check out the info HERE and this gorgeous quilt she is raffling off: 


I am linking to these recipe parties: The blogs hosting Healthy Vegan Fridays are Suzanne at Hello Veggie, Anna at Herbivore Triathlete, and Kimmy at Rock My Vegan SocksI’ve also decided to submit this dish to What I Ate Wednesday hosted by Peas and Crayons.